Showing posts with label vegetarian. Show all posts

Wednesday, December 31, 2014

Cookbook Review: Tassajara Cooking


     A couple months back I picked up a new cookbook at Powell’s in downtown Portland I randomly came across while browsing. The book is from the early 1970s, but doesn’t have the kitschy 1970s cookbook feel to it. More of a guide book, this is quite the un-recipe book, to be honest. There are no pictures, but it does offer a good variety of hand-drawn illustrations that show you how to chop a particular vegetable or just a simple image of a kitchen inspired still life.

     Tassajara Cooking is named for the world famous Zen training center founded in California in 1967. The book was a combined effort of the residents, family members, and friends of the Zen Center.


     The back of the book just might be my favorite cover of all time:

This is a book to help you actually cook – a cooking book. The recipes are not for you to follow, they are for you to create, invent, test.
It explains things you need to know, and things to watch out for. There are plenty of things left for you to discover, learn, stumble upon.
Blessings,
You’re on your own.
Together with everything.


     Created by the folks at the San Francisco Zen Center and published by Shambhala, the book is fully vegetarian and divided into five main sections: Beginning, Cooking Vegetables, Other Basic Ingredients, Pumpkin Isn’t Always Pie, and Good Friends.

     The first section offers tips on caring for your kitchen knives, how to tackle some basic cooking techniques, and also offers a brief rundown of common vegetables, grains, and herbs used around the typical vegetarian kitchen.

     Next up is a good section on vegetables – potatoes, leeks, garlic, carrots, cabbage, mushrooms, corn, and on and on. This section is broken down into warmer and cooler weather with an oddball section for other stuff. Overall, there are tons of ideas and very basic outlines for a variety of recipes.

     The third section of the book, Other Basic Ingredients, covers fruits, nuts, beans, seeds, dairy, eggs, grains, and pasta. There are some unique ideas on fruit here, so it’s not to be overlooked. The bean and legume area is just as important as well, how to not split your beans while they’re cooking, and cooking times for pressure cookers as well as just an open boil on the stove.


     Pumpkin Isn’t Always Pie takes a slight detour from the rest of the book which focuses more on simple flavors and showcasing the ingredients in their own right. Here, we are given more complex and strong flavors for salads, dressings, soups, stocks, and sauces.

     Lastly, we are given a briefing of some of the true work-horses of the kitchen: our cutting boards, bowls, pans, and the like. Talk about care and storage is brief but loaded with good information like don’t use your kitchen sponge on the floors or your dish towel on your face and hands. Cleaning and care are mostly discussed here with a reminder that ‘cooking makes cleaning possible and cleaning makes cooking possible’.


     What I enjoy most about the book is the emphasis to create simple meals using just what you have on hand before acquiring any additional goods or produce. I’ve leant some cookbooks and recipes out to friends in the past and I heard back they weren’t able to make anything because they were missing one or two of the ingredients. I try to offer advice to substitute things out or just make the dish without, and this is a radical concept to some folks. I feel that the guide book style of cookbooks, like Tassajara Cooking and The Flavor Bible, are best suited for these individuals. Everyone’s comfort level is different in the kitchen and this is a great way to learn to cook rather than learning to follow a recipe.

- Patricia
Continue Reading...

Tuesday, December 16, 2014

Sushi - Easier Than You Think


     Sushi can be ridiculously expensive when you eat out, even at the cheap little sushi-go-round places that are becoming more popular these days. To combat this dilemma but still get our sushi fix, I’ve been making it at home for probably 5 or 6 years now. When talking to friends or family about dinner options and I mention sushi, they often wonder if I’m being serious about making it at home or if just referring to ordering take out.

     It seems when you mention making sushi, people often conjure up images of a serious-faced man behind the counter in a white ensemble with a ridiculously sharp knife and decades of experience. While I do not dispute this is probably a badass sushi spot to imagine, the reality of making it at home is super easy and much less intimidating than this imagery.

     Just to be clear, we still go out for sushi every great once in a while. We usually go out so I can enjoy the salmon or tuna rolls and Thomas can enjoy some tempura vegetables. Saki is usually a given, as well. Being pregnant, however, the raw fish and Saki is off limits to me for a while, so we pick another fare to grub on.

     Making sushi at home requires only one essential tool: a very sharp knife. We find that using a serrated bread knife, not a steak knife or serrated utility knife, is the magic trick for us. We use the Victorinox 10-1/4-Inch Fibrox Wavy Bread Knife . Thomas does the cutting and I do the rolling, but the handle on this knife is made of Fibrox, a great material to keep your hand from slipping around if it is wet or has some grease on it. Our go to kitchen set of knives all feature this handle and we love them.

     Beyond the sharp knife, you need to know how to cook some sushi rice. No brainer here, you can search around for some tips and tricks, or if you have a rice cooker, it is super easy for you. Otherwise, I’ll give you my sushi rice cooking rundown. Water to rice ratio should be 2:1, so 2 cups of water for 1 cup of dry rice. We just make one cup of rice for the two of us and usually get about 5 or 6 rolls. Bring your water to a boil, dump in your rice, stir it well and turn it way down to low-medium and put a lid on it. I have an electric stove with a 1-10 dial system and I put it around 2.5. Don’t peak at your rice. Don’t do it. You might have a little bubble over or some spitting from around the lid, but this is normal. If it’s pouring out, I’d turn it down even more. Low and slow is the key here. It takes about 10 minutes or so, give or take a couple to finish the rice. Turn the heat off when it has finished.

     If you want to season your rice, do it when the cooking has finished. For one cup of rice, I use 1 tablespoon each of rice vinegar, tamari (gluten free soy sauce), and sugar. Swirl this around in a bowl or cup to help dissolve the sugar then dump into the rice and fluff with a fork. Let the rice sit with a lid on it while you finish up the rest of the prep work.

     Rolling the sushi seems to be what intimidates folks the most. I use a cutting board or my counter. No fancy bamboo mats or paddles, just my hands and a clean, dry flat surface. Get out a sheet of your nori (the seaweed wrap for the sushi) and lay it down on the working surface. It usually comes as a rectangle, and you’ll want a short side toward you. I use a 1/3 cup measuring cup to scoop rice out for consistency. Spread your rice around to almost the edges with a fork, leaving about a 1” – 1.5” space at the side closest to you for placing your fillings.


     Once you have your filling in place, place your fingers near the top of your fillings and scoop up the edge of the nori with your thumbs. Now that you’ve got the roll started, just use your fingers and thumbs to walk the roll up the rice covered nori, tucking in any loose filling that shoot out the ends. Transfer seam side down to a plate or another cutting board for cutting.


     Filling options are fairly open-ended here and where your creativity (and random leftover veggies) comes into play! We’ve used cream cheese (vegan or regular), match-stick sliced carrots, cucumbers, pickles, green onions, red onions, avocado, sesame seeds sprinkled on the rice, lettuce, spinach, kale, hot mustard smeared on the nori under the fillings, and radishes just to name what I can think of right now. It really is open to whatever you want to put in there.

Generic Sushi
Serves 2

Ingredients
Toasted nori - look for this in the International food isle or in a specialty store if you have one nearby. Amazon also has good options.

For the rice:
1 cup dry sushi rice
2 cups water
1 tbs rice vinegar
1 tbs sugar
1 tbs tamari

For the filling:
(Filling options are endless, but here are some suggestions based on my favorite fillings)
Cream cheese
Green onions
Avocado
Red onions
Cucumbers
Pickles
Carrots
Sesame seeds
Lettuce
Spinach
Kale
Radishes

Method
First... Boil water, add rice, stir, reduce heat down to low and cover. Cook for around 10 minutes. Mix the tamari, vinegar, and sugar in a bowl before adding to rice after cooking is done. Fluff with fork and let sit for a few more minutes while you finish prep work.

Then... Prep your filling choices, cutting them into match-stick shaped pieces. They don't have to be uniform or pretty, just a general shape so they roll easier.

Finally... Place a sheet of nori onto your working surface, place 1/3 cup of rice in the middle, and smooth out to near the edges, leaving around 1" - 1.5" at the bottom end to place your ingredients. Roll the sushi, using your fingers to stabilize the filling and your thumbs to flip the end up, and walk the roll to the top of the nori. Transfer seam side down to a plate for cutting.

     One of the things I didn’t mention here is how great of a couple’s activity making sushi is. There is a good bit of prep work involved with all the cutting and various little things to do. It is something that I look forward to making a couple times each month with my spouse, even though we almost always make dinner together. We both really enjoy the meal, thinking of new filling ideas, or just noshing on sushi and Saki while we watch a movie together.

Enjoy!
- Patricia
Continue Reading...

Friday, December 12, 2014

Artichoke & Lemon Pasta


     There isn’t too much more that I love than a simple bowl of pasta dressed up just slightly with a little something special. It is the ultimate in comfort foods for me and I could eat pasta almost every day for lunch at work with no regrets. I would make it more often at home, but the spouse isn’t the biggest pasta fan and tires on it rather quickly, so I try for maybe twice a month or so.

     This pasta dish is a quick throw together lunch for one, or you could easily double or triple it for dinner for the family or for several lunches during the week. It comes together so quickly, that I’ll sometimes make it in the morning while I’m scurrying around the house getting ready for work. I try to heat up my lunch and store it in a thermos so I can avoid the lines at the microwave in the break room and the awkward conversations that brings. It is also super convenient to just grab my thermos and walk over to a local park and eat lunch outside – it makes for a great change of scenery.


Artichoke & Lemon Pasta
Serves 1 hungry person

Ingredients
1/3 – 1/2 Jar of marinated artichoke hearts
1/4 bag Trader Joes Brown Rice Pasta
1/2 Fresh lemon

Optional Toppings
If you’re feeling ambitious, you can zest a bit of the lemon into the pasta
For a creamier pasta dish, add a bit of non-dairy salad dressing. I like Drew's All-Natural Salad Dressing and 10 Minute Marinade, Roasted Garlic & Peppercorn, 12-Ounce Bottle

Method
First... Boil your pasta according to bag instructions, drain, and return to pan. If you want this to be a cold dish, which is equally delicious, rinse your pasta in cold water for a minute or two.

Then... Remove the artichoke hearts from the jar and cut into quarters. Separate the layers and add to pasta. Squeeze the lemon, being careful to avoid seeds, into the pasta.

Finally... Stir well, adding any optional toppings you want, before serving immediately or packing away for lunch.


- Patricia
Continue Reading...

Tuesday, July 15, 2014

Baked Avocado


     One of my all-time summer favorites to make is my Southwest Salad. It requires zero cooking, very little prep time, and provides an excellent refreshment to hot summer afternoons. The star in that salad is a ripe avocado.

        You see, the plan was to make this salad for lunch last weekend. After our breakfast and coffee were finished Saturday morning, I ran out to grab a few things from the store including the avocado I needed to make lunch. While choosing my avocado, I sneakily used that trick where you remove the little brown stem-thing and see what color it is underneath. Green is perfect and brown is too ripe, supposedly. I got a green one, first grab. Super score.

        What ended up happening as I excitedly cut into the avocado was encountering something like a force field below the skin. I did manage to get it halved with all of my fingers intact, but the mother of all unripe avocados was now sitting before me. Ugh.

        I searched around trying to find some quick fixes, but none were feasible considering I wanted cubes, not mush. I asked my spouse for input and he suggested baking it. I resisted at first because I’m eating as little milk as possible these days and he doesn’t eat eggs, and most baked avocado recipes out there are all about sticking an egg in the middle of it and adding cheese. We decided to just slice up the avocado, bake it, and eat it alongside pintos and some leftover Mexican Rice.

        I was over the moon with this new dish after my first bite! The avocado was quite firm prior to cooking and it developed a delicious outside skin and a smooth, warm inside that was still just a little firm to the bite. I paired this lunch with 2Towns BrightCider and it was an outstanding accompaniment to the baked avocado. I have been raving it about it every few day since we ate this. I highly recommend you try it. We topped this with diced sweet onions and he added some shaved smoked cheddar.

Baked Avocado
Serves 2

Ingredients
For the rice & beans:
1 ¼ C water
1 C salsa
1 C white rice
1 can beans of choice (pintos, black, or red would work really well here)

For the avocados:
1 firm avocado
Drizzle olive oil
Black pepper
Salt
Cumin
Chipotle powder
Paprika
Thyme

Optional toppings:
Sour cream
Shredded cheese
Diced green/white/red onions

Method
First... Preheat your oven to 350* and line a heavy baking sheet with parchment or foil.

Then... Slice a halved avocado and remove the skin. Place avocado pieces into a bowl and top with a drizzle of olive oil and a few dashes of each of the seasonings. Toss around to coat evenly, transfer to the lined pan, and bake for around 20 to 30 minutes, depending on your oven. Test doneness with a fork periodically.

Finally... While the avocado is busy in the oven, get the rice and beans started. Bring water and salsa to a boil, then add rice and stir. Open can of beans and drain in colander, rinsing well. Cook rice until water is absorbed, add beans, and fluff with fork. By this time, the avocados should be about to come out of the oven. Take care of any toppings you want, such as shredded cheese or diced onions.


- Patricia
Continue Reading...

Sunday, April 24, 2011

Traveling and the Importance of Easy Meals

     One of the only downsides about biking everywhere is the lack of long distance transportation. I can easily ride 10 miles on my bike to go somewhere, but that is about the upper limits of my abilities when time is taken into consideration. It's not too convenient beyond that. 

     The end of this past week and the beginning of the weekend were spent mostly in San Antonio with my lovely niece I had not seen in three years. She was able to catch up with her boyfriend and his family while Thomas and I were able to take in the sights of San Antonio. It truly is a beautiful city with a bit of old world charm. Because we had to be in town so early we were able to see it as few people get to, nearly empty.


     By the time we got home, we were all exhausted and wanted to do nothing more than go straight to bed. Dinner, however, needed to be dealt with. Two bags of 10oz frozen corn and a couple of potatoes to the rescue!


Corn Chowder with Roasted Potatoes
Serves 3

Ingredients
For the chowder:
2 - 10oz bags of frozen sweet corn
Handful of cilantro, washed, stemmed, and chopped
1/2 onion, chopped
Olive oil for frying
1 tsp poultry seasoning
1/4 tsp chili powder
2-3 cups water
1/4 - 1/2 cup soy milk
Salt, to taste

For the roasted potatoes:
2 or 3 small to medium potatoes
1/2 onion, chopped
Olive oil for coating
1 tsp salt
1/4 tsp cayenne

Optional Toppings:
Shredded cheese
Diced green onions
Sour cream
Diced cilantro

Method
First... Preheat your oven to 350*F while you prep the potatoes by washing them well, then dicing into bite sized pieces. Nothing fancy here, just keep them a uniform size. Toss together in a bowl with the diced onion, coat with the olive oil, then add the salt and cayenne before mixing well. Toss the potatoes in the oven on a foiled or parchment-lined baking sheet for around 25 minutes or until fork tender.

Then... While the potatoes are baking, you'll make the corn chowder. Start by heating oil in a soup pot and adding the onions to fry for around 5-6 minutes. Add the salt and other dry seasonings and mix well. Add the frozen corn and enough water to cover before bringing to a simmer. Carefully transfer around 1/2 of soup contents to a blender and blend, using the remaining water for easy blending. Return contents of blender to soup pot, add cilantro, and continue simmering. After 10 minutes of additional simmering, add the milk and turn heat off.

Finally... Remove the potatoes from oven. Ladle soup into bowls, top with roasted potatoes and any optional toppings desired.

     Because this recipe is so basic, there are many ways that you could make it your own. Try adding some salsa or chili garlic paste to the blender for a spicier touch, a can of chopped tomatoes with green peppers, or use a can of black beans instead of the second bag of corn for a slightly different soup. Make it yours!
- Patricia
Continue Reading...

Tuesday, January 4, 2011

Cookbook Review: The Modern Vegetarian Kitchen by Peter Berley & Melissa Clark

     I recently came across The Modern Vegetarian Kitchen by Peter Berley & Melissa Clark while I was browsing Amazon and instantly added it to the wish list to buy it when my financial days are a bit sunnier. I knew I would love it from the reviews and the awards it has won. Thomas, the boyfriend, saw it on the wish list a couple of days later and got it for me as a late holiday gift from Half.com for much cheaper.
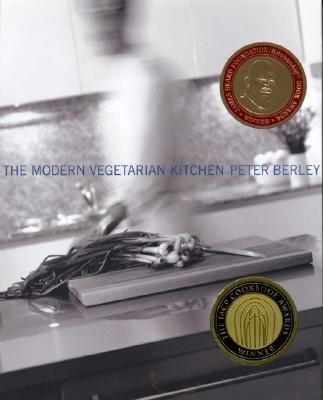


     Out of the roughly 400 pages worth of recipes, only about 55 to 60 of them are not useable by those with Celiac. And I love that! In fact, most of the recipes are vegan or can be quite easily made vegan. Again, I love that!

     The book comes with high reviews from Amazon users and the author's other books have also garnered high marks from readers. I can see why with such a useful, non-intimidating, and delicious array of recipes that are broken down by type and season. There are no pictures of the meals, a feature that I like as it does not give false expectations (or hope!) to struggling / aspiring chefs. The book does, however, feature zine-like illustrations that show particular preparation methods, mostly of dough preparation and vegetable chopping.

     The book is divided into sections – Soups & Stews; Seasonal Salads; Vegetables; Pasta, Whole Grains, Polenta, Risotto, & Porridge; Beans & Pulses; Tofu, Tempeh, & Seitan; Breads; Condiments & Sauces; Desserts; Seasonal Menus. Each of these sections is further divided into subcategories like seasons, hot or cold, side or main entree, and dips or spreads.

     I heartily recommend this cookbook to vegans, vegetarians, and omnivores alike. I have not had many chances to cook out of this book yet, but I've already tagged a couple recipes to try out and I'll be sure to let you know when I do. The ingredients are made up of basic items that someone who is living outside of a metropolitan hub can have a fairly easy time finding. A few of the ethnic ingredients might be more challenging to find, but 99% of the ingredients called for can be gotten on a basic trip to the grocery store making it quite practical.

     Another point I want to mention, although it has nothing to do with the quality or variety of recipes, is the layout of the book. It's quite a visual book despite the lack of photos. the typesetting is enjoyable and the layout makes it easy to keep your place when only half paying attention.
Continue Reading...

Friday, July 23, 2010

No Fuss Hashbrowns For One

*Vegan and gluten free.
This is an easy-as-it-gets recipe. I would let a 12 or 13 year old do this on their own, with limited supervision – not that I have children or know any 12 or 13 year olds. Seriously, though, it's a fast and easy recipe that calls for very few ingredients, quick prep, and instant gratification.

What you need:
1 medium potato½ sweet onion
3 or 4 sprigs of thyme
Fresh ground pepper
Dash of saltOil for cooking
(You can easily adjust the ingredients for more than one serving)

(I'm eating this as I write the recipe!)
How to do it:
Chop up the onion into smallish pieces. They don't have to be perfect and uniform, just smallish so they'll soften up while cooking. Bag the other ½ of the onion and throw it in the fridge for a later use. Dump the onions into the bottom of a small mixing bowl.

Take your handy-dandy grater and grate that potato, baby! Only after you've washed it and picked off the bad spots with a knife, of course! I prefer to just stick the grater in the bowl so I don't have to transfer it over later, but if you do it elsewhere, put the potato in with the onion.
Pick the thyme off the sprigs and do your best to chop those little guys up a bit. Nothing fancy, just get the job done. Dump that in with the onion and potato and add some fresh ground pepper and some salt to the top before digging your hand in and mixing it all up. You could use a fork to do the mixing, but what's the fun in that?


Coat the bottom of a medium or large skillet with olive oil (use a spray bottle or a paper towel moist with olive oil) and heat it up to medium heat. Once hot, dump in the potato mix and scoot around to form to potato blobs. Again, nothing fancy, just makes it easier to turn two smallish hashbrowns than one large hashbrown. Cook for about 3 or 4 minutes per side, or until your desired crispiness is achieved. I topped mine with Daiya and Braggs and flipped them over, Daiya side down, to help melt the cheese. The cheese doesn't stick too bad in the skillet, so just about 30 seconds should do the trick.

Eat and enjoy. Sharing optional.


Continue Reading...

Monday, July 19, 2010

Vegan & Gluten Free Meal Plan for 19 July – 24 July


     I try to create a meal plan each week.

     This is much easier said than done, however. Between the boyfriend and I, there is no dairy, egg, or gluten in 99% of what we eat for dinner. We also avoid processed foods and aim to only eat real foods or prepared dishes that only incorporate real, whole foods in them. We lean towards organic when we can to help avoid GMOs and for the less environmental impact their conventionally grown counterparts. He doesn't like tofu or pasta all that much, either, and we rarely eat out – like five times a year. We do this for about $80 to $120 each week and manage to get plenty to eat for dinner, lunches, breakfasts, snacks, coffee, and juice.

     When Friday night rolls around, it means meal planning night. The boyfriend usually has the guys over for game night on Fridays and I usually get a bit of time to myself to read or piddle around on the internet. Nothing too serious gets done as the noise level is not conducive to studying or creating, but it is an enjoyable time for me. Almost forces me to just veg out for a bit, something I do not like to do normally. Early Saturday mornings or late evenings are usually our time to ride down to the farmers market and grocery store, so it is imperative that I meal plan on Friday night or at least before we go.

     When meal planning does not occur, the grocery store trip is a bit disorganized and we often buy things that we do not use right away. No meal plan also means me stressing out when it comes time to start making dinner during the week. Me and stress do not go well together. No meal plan also means tater-tot tacos for two or three days a week, lots of chips, salsa, and guacamole, and random vegetable risotto.

     Meal planning is the way to go, folks. Keep your sanity and help keep your dinner time as stress free as possible. You're making food to nourish your body with and the better that you feel about what you're making and how you're making it, the better the dish will be for you and your dinner mates to enjoy. This being said, here is the meal plan for this coming week:

Meals:
Potato and Onion Soup
Burgers with Lemon Pepper Quinoa
Chili & Cornbread
Stir Fry
Tacos
Spaghetti & Garlic Bread with Salads

Grocery List:
Curry Paste
Onions x3
Chips Lemon x1
Salsa
Lettuce
Rice Noodles
Cabbage & Parsley (for the rabbit)
Chili Mix
Diced Tomatoes
Broccoli
Cereal
Potatoes ~ 1.5lbs
Ice Cream
Daiya - White
Burgers (We buy Sunshine, check them out – best veg burgers you can find, hands down!)
Pasta Sauce
GF Bread
GF Spaghetti
Soups for Work Lunches
Bell Pepper x1
Bread
Flavored Salt (almost out!)

     I will be doing an ongoing series of posts about these meal plans as I create them, but I will also be posting older meal plans that I have created as well. While I have been meal planning regularly for about eight months now, I only begin to keep track of them after I realized that there were almost no vegan, vegetarian, or gluten free meal plans available that I really could use and enjoy. Too much crispy tofu and grilled vegetables. Or if they were semi do-able for me, like the one over at Vegan Health, they were too short at only three days. Regardless, I hope that this makes it a bit easier for someone out there searching for a decent veg friendly and low allergy meal plans that aren't too boring.
Continue Reading...

Monday, May 24, 2010

Vegan & Gluten Free Meal Plan for 24 May - 29 May

Here's this week's meal plan:

Sunday:
Pizza Night! (I bought Udi's gluten-free pizza crusts – pre-made and frozen, delish! He used Naan bread out of the package to make pizzas on.) Toppings: artichoke hearts, spinach, black olives, potatoes, pizza sauce (Mur Glen's), and Daiya.

Monday:
Cornbread Stuffing
Potato Wedgies

Tuesday:
Indian Food

Wednesday:
Lasagna Rolls

Thursday:
Lentils of Doom

Friday:
Tacos (probably potato and onion, but we'll throw in whatever we've got laying around)


Grocery List for the week:
Indian food
pizza crusts
samosas,
tomato & pizza sauce
quinoa (bulk)
white potatoes
salsa
pablano peppers
cornbread mix
frozen corn
spray oil
juice
olives
Naan
spinach (bulk)
basil
black pepper
bread
artichoke hearts
baking potato
tortillas
Daiya
Continue Reading...

Sunday, May 16, 2010

Vegan & Gluten Free Meal Plan for 16 May - 22 May


     Here's an old week's meal plan. We spent about $83 at Whole Foods. That's really good for a week's worth of organic, whole foods for breakfast, lunch, snacks, and dinner. We also ate a lot of potatos this week. A lot.

Meals:
Burgers w/ Quinoa & lemon pepper broccoli
Canned Indian Food
Roasted vegetable pasta w/ Potato wedges
Risotto & Polenta
Potato & Leek Soup
Potato, bean, and onion curry
Potato & Onion Tacos

Grocery List
Sunshine Burgers
Yellow Onions (2)
Zucchini (2)
99c herbs (I got lemon thyme)
Leeks
Toaster pastries
Poultry seasoning
Lunch for work (soups & rolls)
Salad dressing
Tortillas
Baking potato (1)
Continue Reading...

Monday, May 3, 2010

Vegan & Gluten Free Meal Plan for 03 May - 08 May


     Here is another week long meal plan that I made back in May of this year. I no longer do it by the day as it seems that I begin to feeled obligated and tied down, even guilty if I do not follow the meal for the day.

Sunday
Risotto with Mushroom and Kale Polenta

Monday
Mexican Baked Potatoes with Broccoli and Cheese (Daiya)
Salad

Tuesday
Canned Indian Food

Wednesday
Potato Soup

Thursday
Fetuccini Alfredo with Vegetables
Salad

Friday
Red Lentil Curry
Salad

Grocery List:
Daiya
Baking Potatoes
Avocados
Green Onions
White rice – bulk
Salad Dressing
Indian Food
Red Potatoes
Zucchini (1 large)
Bread
Carrots (2 bunches/$3)
Coconut Milk (small can)
Mushrooms (4 or 5 buttons and Shiitake)
Onions (2 large)
Fettuccine
Juice
Silken Tofu
Continue Reading...

Followers

Follow The Author